How to Setup L2TP VPN on Mac OS
b.VPN offers its users six simultaneous VPN connections. Therefore, if you would like to use b.VPN service on six devices at the same time, you can use b.VPN application on three devices and manually configure L2TP VPN connection on the other three. The following steps show you how to setup L2TP VPN on Mac OS.
Important Notes:
*Click the link below to view a list of available L2TP VPN servers and the matching "Shared Key".
https://www.bvpn.com/en/accounts/profile/l2tp_server_list/
*Your username and password are your registered e-mail address and password on b.VPN.
*You have to be a paid user in order to use L2TP VPN connection.
Follow these steps to setup L2TP VPN on Mac
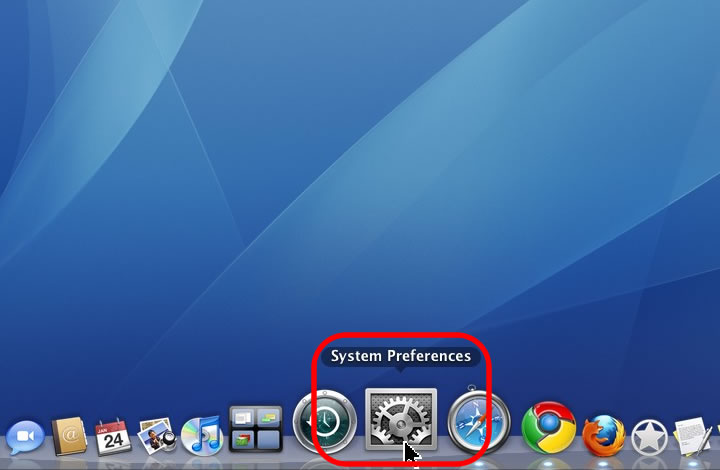
Click “System Preferences”.
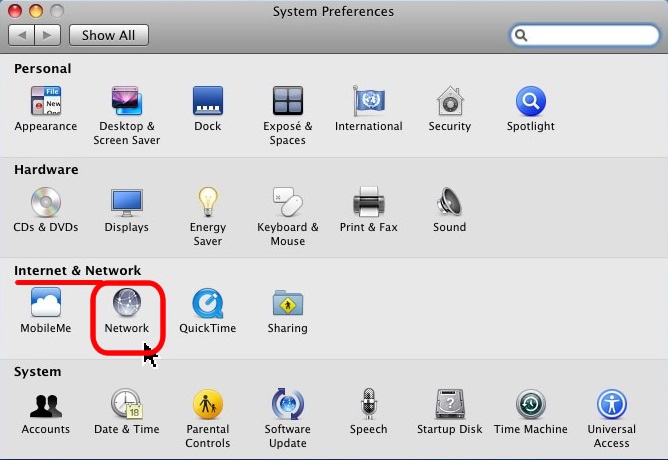
Click “Network” under “Internet & Network”.
Click on (+) icon.
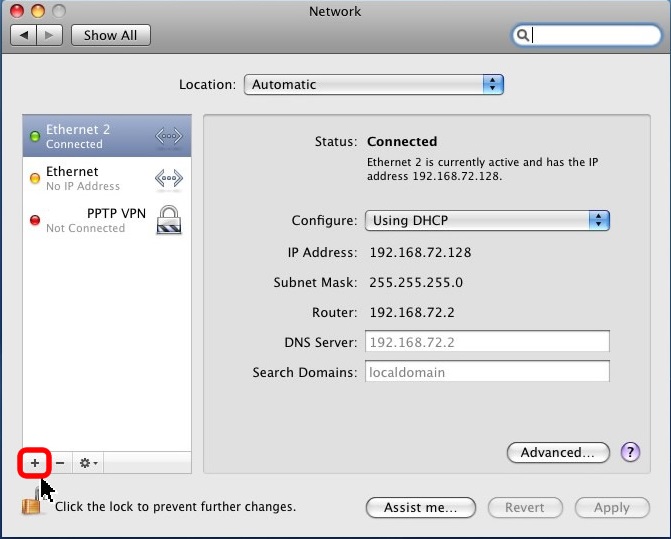
Select the interface and enter a name for the new service:
For “Interface”, select “VPN”.
For “VPN Type”, select “L2TP over IPSec”.
For “Service Name”, type a descriptive name for the Service Name (it's recommended to use the server address in this field also). Click on “Create”.
Select the recently created VPN connection:
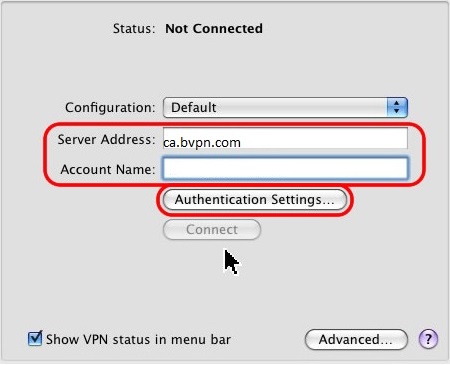
Type the server name in the "Server Address" field (e.g: ca.usa.bvpn.com).
Type your VPN username in the "Account Name" field.
Click “Authentication Settings”.
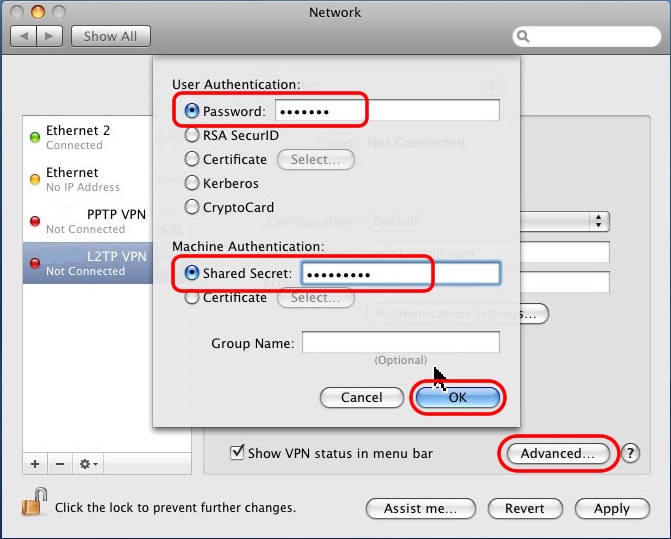
Authentication Settings:
For “User Authentication”, select “Password” and enter your VPN account's password.
For “Machine Authentication”, select “Shared Secret” and enter the required password: (oorg5y8ajugiwgc).
Click on “OK” button and then click on “Advanced” button.
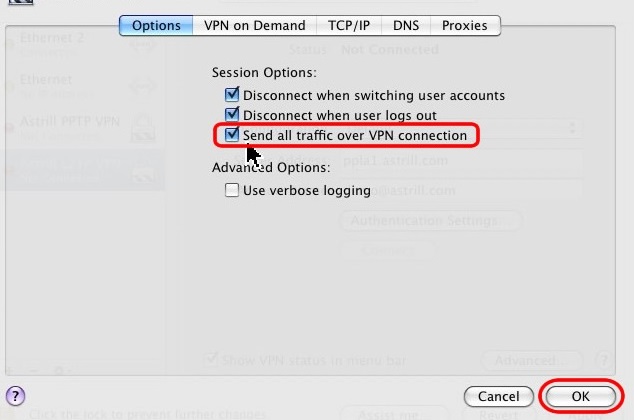
Check on “Send all traffic over VPN connection” box, then click "OK".
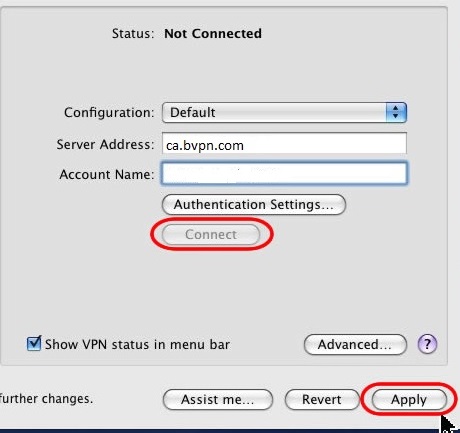
Click “Apply”, then click the VPN icon in the menu bar and then click on “Connect” button.
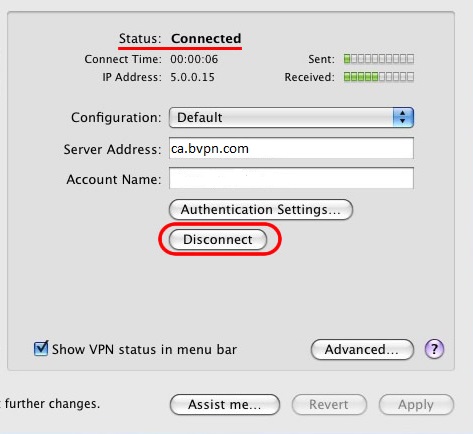
You will then notice your Status: Connected.
Now you have successfully configured L2TP VPN connection on Mac.
To disconnect from L2TP VPN connection, simply click on the Disconnect button.